Showing posts with label Artwork. Show all posts

Friday, January 18, 2013

Let It Snow Decoration

I'm in Boston for the weekend with Molly and Connor for our annual winter trip!  We go in January every year to see friends and family from where I grew up, visit the children's museum or science museum (we don't have either here in Bluffton, SC!) and feel the winter weather (it's been 75 this week here.) These Boston temps look chilly.  My adapted South Carolina blood may not be able to handle these freezing temperatures. 


Ginger Bowie created a fun winter decoration for around the house for chilly temperatures this winter!  It's a "Let it Snow" block that you can display anywhere in the house that needs a little dressing up. 


Ginger has stamped Fancy Flakes Peel & Stick stamps on white paper, sealed them with Mod Podge so they hold up, and then adhered them to the block.  We love Fancy Flakes for winter!

What temperature is it where you live? 


Monday, October 15, 2012

Sentimental Recipes


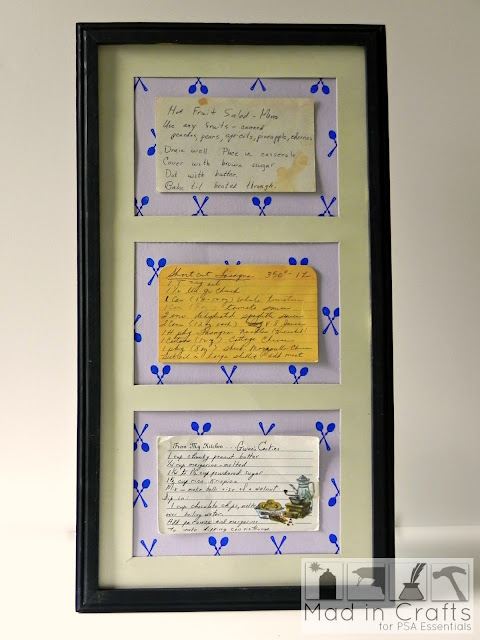
There are those recipes that get handed down from generation to generation, or those recipes that are family secrets or those that when made bring the whole family together.  These are sentimental recipes. Ones that you cherish!   For my wedding my mother gave me a book of family recipes that I refer to often, I cherish the “Pasta villa Francesca” one the most. It always save me in a pinch!   Jessica Hill of Mad in Crafts had an idea to display a few of those special recipes as artwork.   Now the kitchen not only smells of yummy goodness, but looks good too!  


Jessica purchase a three picture frame window.   In the picture windows, Jessica stamped the spoons design from PSA Country Home Peel & Stick stamps in royal blue ink with her PSA Stamper.  It spices up these recipes and creates a little more visual interest.   I love how she created “eat” with the letters out of newsprint and Mod Podge.  It’s the perfect graphic accompaniment to this artwork.    Take a look again - pretty neat, huh? 


Friday, October 12, 2012

Monogrammed Silhouette Artwork


I have an entire board on Pinterest dedicated to “Artwork I’dlike to recreate.”    I am certainly pinning this one!  Jessica Hill of Mad In Crafts created this monogrammed silhouette artwork.   She used frames and silhouettes around the border, then stamped “H” from PSA Archive Peel & Stick pack for Hill in the center where the photo should be.  The result is an antique finish look for the right mantel or wall.  There are a lot of legs to this idea, adapt with your own style, certainly your own monogram, or background designs! 


Tuesday, September 18, 2012

Scripture Canvas

Check out this DIY Scripture Canvas by Ashley at Cherished Bliss.   She's one of our newest design team members! You can adapt the words and lettering to whatever saying you choose, I have provided some ideas at the end.  I adore the straight forward nature of the artwork, it's simple yet powerful.


You will need the following supplies:
  1. Canvas
  2. Sharpie
  3. PSA Essentials Archive Peel & Stick stamps & PSA Essentials Vanilla Peel & Stick stamps 
  4. PSA Essentials Stamp Centering Tool


Here's a tutorial.  It's pretty simple, but a little time consuming.  
  1. Draw a line down the center (vertically) in pencil very lightly.
  2. Divide the height of the canvas into equal parts and draw lines across horizontally so you can center the words.  
  3. Using the Stamp Centering tool,  line it up with each pencil mark and stamp each word out.
  4. Let the words dry, then spray with hairspray to set it. 
  5. Erase the pencil marks.
  6. If you choose, the scripture at the bottom was written in sharpie

I used to keep a quote book filled with all sorts of inspiring words.   I've included some ideas of DIY Canvas quotes you can use, if the scripture isn't your thing!  These all would work well on a canvas.


The last one is my favorite!  Please share your DIY Canvases on our Facebook page if you recreate this.  We'd love to see what inspiring words you use in your artwork.


Friday, May 4, 2012

A Room for 2.0


Part of my nesting for Baby 2.0 (my “womb name” for my 2nd child due on May 18th) has been agonizing over the nursery and what it should look like.   The room was previously Molly’s before we moved her into a new bedroom, and not wanting my 2nd child to start off on the hand-me-down foot, I wanted to redecorate so it was different, unique and special for this baby.   The project has taken me months (not because it's been difficult to do but because I have made so many changes...) and I’ve run out of time.   It’s finally ready!


If you want to learn more about the artwork, check out my post on the Elephant Artwork I made.  (http://psastampcamp.blogspot.com/2012/03/baby-20.html). 


All ready! 

Wednesday, April 18, 2012

Nursery Wall Art - Animal Silhouettes

While preparing for Baby 2.0, I’ve spent hours pinning nursery artwork ideas on Pinterest.  Recently, I created a canvas but I am still searching for ideas because I have a few blank walls that need to be filled.   Mae Armstrong created this wonderful idea that’ll save you a bundle from purchasing on Etsy or any other store like I’ve been eying.  They’re animal silhouettes! 


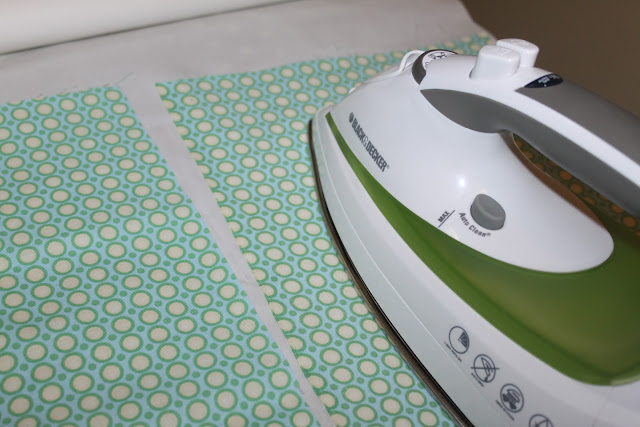
Prepare the printed fabric by cutting them down to fit an 8.5x11 size.  Match the size to the heat bond material and cut both of them to size. Iron the fabric on top of the heat bond and make sure the iron setting is on high.


Clean and trim extra fabric.


If you have a Silhouette SD to cut out animal silhouettes, use that.   You can also download clip arts online and print, trace and cut by hand. If you have a friend that owns a Silhouette...kindly ask if they can help you cut the fabric because this project is so easy and addicting to make.


Arrange the animals on the poster size canvas.  Mae picked 24" x 23" for this project. Iron the animal silhouettes directly onto the canvas. Make sure your iron is clean, you don't want any stain on your artwork. You can also use a sheet of white copy paper to protect the canvas.


Mae created a banner style shape and prepared them using her Silhouette machine.   She stamped the corresponding labels using PSA Essentials Vanilla Peel & Stick Stamp Set. This is such a perfect font style to use for this project. 


Arrange the stamped banners before adding glue.  Mae likes silicone glue. It dries fast and easy to work with.
And viola!  You have stylish wall art - a great addiction to any future bedroom/playroom. Check out her son Ryan scoping it out!


Friday, March 16, 2012

Baby 2.0

It’s time to announce the impending arrival of Baby 2.0!   I am 30 weeks pregnant and due May 18th.   “2.0” [pronounced two-point-oh] was the womb name my friend Ashley came up with -- it’s like a software version or the latest release of product and it though it is funny, the name quickly humanized during doctor’s appointments.  2.0 is healthy and happy in my belly and has been a good little fetus – no real complaints.  I was tempted to post a sonogram picture but decided thousands of people don’t need to see my insides.   Just imagine that 2.0 is really cute. 

Like with my daughter Molly, we are keeping the gender a surprise until delivery day – so I do not know if this little one will be a boy or a girl.   This makes it fun.  It’s a constant guessing game and is a challenge to decorate and prepare.   I am busy nesting with various organizing projects and getting the nursery ready now that Molly has a new big girl room.  The theme of this room is essentially elephants and giraffes and the color palate is pretty neutral – with white, black, grey, khaki and pops of yellow.   I created a piece of artwork to hang proudly on the wall. 


Here’s how I went about doing it.   I used:


  • Artist’s Loft Gallery Wrapped Traditional Canvas – 24 x 36
  • Artist’s Loft Vine Charcoal – medium
  • Grumbacher paint – black and white
  • PSA Essentials Peel & Stick stamps:  Little Bunny (the elephant)
  • Acrylic block
  • Close to My Heart pigment based ink – off-white
  • Elmer’s Wood Glue
  • Wood letters
  • Recollections Chip board (for additional lettering when wood letters weren’t available at Michael’s)
  • Mod Podge Glossy Finish

First, I free-hand sketched the elephant using the PSA stamp as my guide for the design.


 I then glued on the letters.  "See" and "Explore the World"


I painted it one shade of grey several times, then went in a re-outlined the elephant.   Then it was time to stamp.  


The grey was too flat for me, so I spent some time that brought me back to my glory days of art school – shading it and playing with the paint.  


I cut a globe from a magazine, glued then Mod Podged it on, and drew it into a balloon held by the elephant.


I use Mod Podge to seal the charcoal so it wouldn’t run and seal the stamps, too. 


See how it’s just a bit glossy over the elephant now?


And that’s it – I hope 2.0 likes his/her artwork.