Showing posts with label DIY. Show all posts

Monday, August 3, 2015

DIY Stamped Gift Bags & A Belated Father's Day Recap

Clearly behind on my blog posts, I wanted to share our Father's Day celebration back in June with you because I was so proud of the way my gift bags turned out! That and I have some really cute family pictures from the brunch.

For the three Dads in my life - my husband, Mike, my step-father, Mike, and my father-in-law, Frank, I had fun shopping for some of their favorite things, sudoku, crossword puzzles, books and the like! The kids and I decorated blank white gift bags to make the gift extra special (and provide some crafty, kids activity!)

I used PSA Esssentials Peanuts Flying Ace Peel & Stick Stamp pack to create adorable stamped bags. You can do this with any stamp set to match your theme or occasion. (Whimsy Cakes works great for Birthday Bags! Or try a number from PSA Vanilla Number Set for the age of the person's birthday party you are attending.)


Not to sound too salesy but note that our stamps with the PSA Essentials stamper really make crisp and clean impressions.  This really is because of the self-inking PSA stamper.


I went with a patriotic red, white and blue theme...


I scored some beautiful Papyrus cards from Target.  Since I was hand delivering and not mailing them, I could use my monogram stamp instead of my address stamp.  This is the Antique Cipher style.  Check out the cards!


Of course, Connor had to write a note...


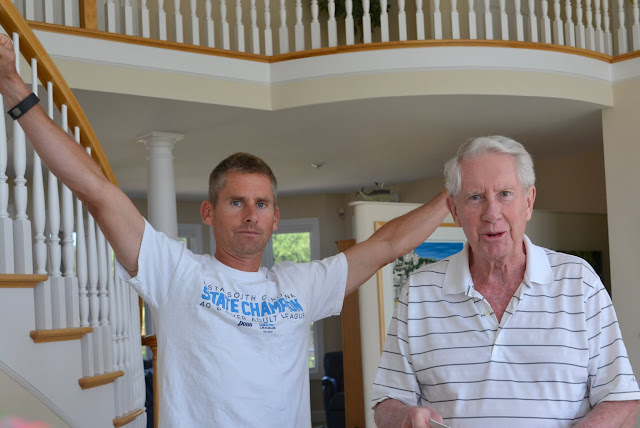
Here we are celebrating at my parents house on Father's Day! I am beyond blessed that we get to celebrate ALL together. My in-laws and my parents are very good friends. No picking and choosing. We get the best of both worlds. I feel incredibly lucky.


Here's to three of the best Dads in the world and all those wonderful Dad's out there reading this. Happy very belated Father's Day! (Feel free to shout, it's AUGUST, Libby! I know, I know... I am really behind...)

Monday, March 16, 2015

Stamped Tie On Tassel

My Very Educated Mother just joined our blog design team and she created a really unique project for us. A stamped tassel that you can use as a key chain, decorative element when gift giving, and even in your home decor, this is a fun and completely unique project. (Never would have thought of this one! This is one of the reasons I love having our design team. They really open us up to new ideas!)


She used the Frenchie Peel & Stick pack which contains the Fleur De Lis -- just a great decorative element. 


 I also love that she chose to use the centering block. It really illustrates how you can get perfect alignment with our tools and accessories.


Head on over to My Very Educated Mother blog to check out the full post and complete tutorial! 

Tuesday, December 2, 2014

DIY Monogram Door Wreath

If you loved Mae Armstrong's DIY fabric pinwheel ornaments last week, you will love this variation on the project. Need a festive, personal front door wreath for the season? Try this one by Mae! It involves quite a bit of work (fair warning) but the result is fabulous and the tutorial is really detailed so you will get a great finished product. Best of all, you can reuse this each season.

For this project, Mae used her PSA Essentials Treeo Peel & Stick stamps. This is really a versatile stamp set!

Mae started by using the biggest embroidery hoop she could find at Michael's.  (Don't forget your Michael's coupon!) 


 Trim the size of the base fabric. For this wreath Mae selected natural burlap as her main canvas.  


Insert the burlap and attach the outer hoop. Tighten the screw and secure. Gently stretch the burlap making sure it's nice and flat. Set aside.


Mae also wanted a black initial and she found that felt was the best option. Using her Silhouette SD, she selected a decorative font and trimmed the letter. She used freezer paper and ironed it using a low setting onto the felt to serve as her pattern.  She then cut the felt and glue the letter onto the center of the stretched burlap.


Mae chose to decorate her wreath with stamped wooden discs mounted on a fabric pinwheel. She used the PSA Essentials peel and stick TreeO stamp set.


Using her Big Shot, Mae selected a circle die to help her with her fabric pinwheel production. It was a truly a great way of cutting all the fabrics she needed.  You'll need five circles to complete one pinwheel.  (And she made a lot of pinwheels!) 


To assemble the pinwheel start by folding the circle in half.


Then fold into a cone shape making sure the edges meet. Secure with glue and begin with the rest of the of the remaining pre-cut fabric.


Mae made a whopping 14 pinwheels for this wreath as she wanted cover the entire hoop. That means this project required 70 circles to complete the wreath.  Since she knew she was going to re-use it again she didn't mind the time of putting it together.  (This woman is amazing!)


Arrange the folded pieces to make a circle. Glue the stamped wooden disc.


Line the edge of the hoop with the fabric pinwheels and spread them out. Secure each pinwheel with glue.


And voila!  Didn't it turn out beautifully!?

Friday, November 28, 2014

Fabric Pinwheel Ornament

An cue the holiday projects! I'm bringing readers dozens of seasonal, DIY, crafty goodness over the next couple weeks.  This idea comes to us from our design team member, Mae Armstrong.  Mae used her Gigi Monogram Peel & Stick stamps by PSA Essentials and holiday fabric to create beautiful monogram ornaments.  These make great gifts for teachers, neighbors, Secret Santa gifts or are just fun, DIY additions to your own tree. 


Want to learn how she did it? It's fairly simple. First she stamped the "A" onto wooden discs to be the center of the ornaments using her PSA Stamper & Gigi Monograms.

Using her Big Shot machine, Mae selected a circle die to help her with the fabric pinwheel production. It was a truly a great way of cutting all the fabrics she needed.  You'll need five circles to complete one pinwheel.


To assemble the pinwheel start by folding the circle in half.  


Then fold into a cone shape making sure the edges meet. Secure with glue and begin with the rest of the of the remaining pre-cut fabric. Mae suggests cutting all the circles in one batch and the rest of the process gets really easy.

Arrange the folded pieces to make a circle. Glue the stamped wooden disc.


 Attach a stretchy gold string and that's it! 

Try making different sets for friends, family, teacher gifts or a fun gift tag for the Christmas! 

Wednesday, August 13, 2014

London & Birmingham

I am back from an incredible adventure to London and Birmingham, U.K for my best friend's "wedding 2.0." Last August, Jenny got married in New Hampshire though because she married a Brit, only a few of her husband family and friends were able to attend.  Wedding 2.0 took place in Birmingham and was celebrated with over hundred guests from all over England and Scotland.  I was so honored to be included and fortunate enough to be able to make the trip!

You can read all about her wedding last year (click to view the post). It was an incredible rustic wedding at Longlook Farm in New Hampshire.  Complete with a DIY bar, photo booth, handmade flower crowns, and so many beautiful handmade details, it's a wedding you should see!  We made her a PSA Essentials personalized stamp that she then used for favor tags and favors.


The day I arrived, I took a double decker tour bus around the city to get a complete tour. I loved Covenant Gardens area, Mayfair district, and it was very interesting to see all the "major" sites (London Bridge, Tower Bridge, the financial district, theater district, Big Ben, Parliament, The London Eye...)  On Friday, Jenny and I went to the Tate Modern in London, which is truly one of my favorite modern art museums in the world. We didn't venture to the Matisse cut out exhibit, but I heard it was fabulous.


One of my favorite things to do while traveling is check out local eateries and specialty shops. I loved seeing the perfumeries and tea shops while in London.


On Friday afternoon, we made our way by train to Birmingham, where Jenny and Dan now live.  It's actually an interesting city that I enjoyed checking out! Friday night, we had fish & chips at her home. It was really lovely!  Saturday morning, I sat by myself in a cafe, had coffee and read the paper for an hour. It was glorious.


Onto the details of wedding 2.0 now! Her mom made the boutonniere and the flowers for Jenny to wear in her hair. 


The reception was held in Dan's parents garden, at the home where he grew up. Gorgeous garden!


There was a short ceremony and some speeches. I was unaware of having to say anything so I "made it up." Not really sure what came out of my mouth! 


Dan asked that all of Jenny's friend state-side make a video... He edited it and it was a complete surprise to Jenny!


Then it was time to party! Well into the night.... What incredible fun we had!


Congrats to Jenny & Dan again! 


To see more of Jenny's wedding in New Hampshire, visit this post: http://psastampcamp.blogspot.com/2013/08/rustic-barn-wedding.html and also check out the Boston Boat Party I hosted for them last August, too!  There were lots of fun PSA Essentials details in that one, too. Visit: http://psastampcamp.blogspot.com/2013/06/an-engagement-party-bridal-shower.html