Showing posts with label Sewing. Show all posts

Friday, November 8, 2013

Thanksgiving Turkey Treat Bag

Do you have little ones coming to your house this Thanksgiving?  Here’s a great idea by Mae Armstrong.   She’s created seasonal treat bags to hang from kids chairs.  Fill these cute Turkey Treat Bags with toys, candy, activities, or little gifts from the dollar store.  Keep them busy a little while longer at the dinning room table this Thanksgiving and get extra festive with this idea by Mae.


Mae started by cutting a pear shape for the body of the turkey out of black felt.  Then she cut a bunch of feathers using a plain orange cloth.  Mae stamped the orange cloth with PSA Essentials Peel & Stick Rosettas to give the feathers a retro design.


She pinned the feathers and arranged them behind the turkey.  You can sew this by hand or you can use a machine.


 After sewing the feathers down, Mae heat bonded on the back of the turkey using her iron.


She created a simple 5X7 canvas pouch and ironed the turkey onto the bag.   She also sewed around the turkey to secure the felt.   She then added some googly eyes and a triangle orange beak to finish the design.


Mae picked a simple grosgrain ribbon to match the feathers. 


For those that sew, this is a relatively simple project!  And those PSA Essentials Rosettas look great on this project! Great idea, Mae.  


Tuesday, October 29, 2013

Stamped Pillow Case Dress

Mae Armstrong of Mae Armstrong Designs always creates the most unique projects and simply the best tutorials.  I love this pillow case dress that she made for her niece.  It's perfect for the season, don't you think?  Adapt and make it yours for any season with different fabric patterns, colors and stamps!  See how she created this stamped pillow case dress. 

Start off by measuring the size for the pillow case dress.   Then prepare the freezer paper initial cutout using your Silhouette SD machine, or whatever you have!


Wrap the fabric on the board (it can be any type of board).  Mae did this process to prevent the fabric paint from sticking to my table.


 Wrap and secure with painter's tape.


Iron the freezer paper stencil and make sure all sides are secure.


Start filling in the center of the cutout.  Mae picked a Tulip soft fabric paint with glitters.  Don't girls love anything sparkly? 


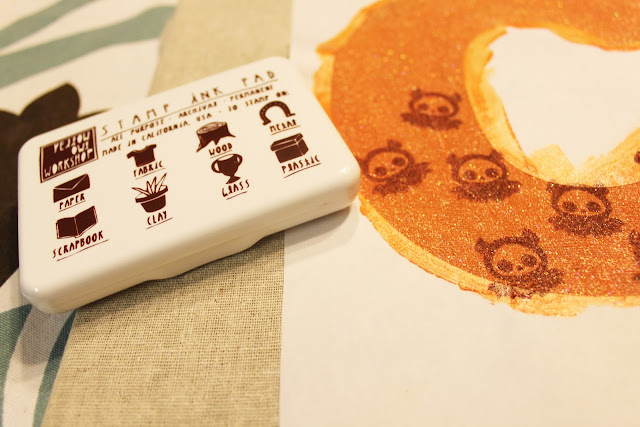
Let the fabric paint dry for a few hours. Then start stamping your image on to the painted area.  Mae used PSA Essentials Skelanimals Chip & Friends Peel and Stick stamp set.  Try using PSA Haunted Shack, or Hello Kitty, or any of our Peel & Stick stamps


Mae used Yellow Owl Workshop stamp pad. Mae did a lot of research and says she thinks she found true love pn this ink! Since she works with fabric all the time, she thinks it's worth getting the ink pad just for that purpose.


 Here's the stamped initial.


 After letting the painted and stamped initial dry. Start adding the elements to the pillow case dress.


Mae added a cute fabric trim and did a simple French seam.


 Pin all sides of the dress right side up in preparation for French seam.


 Sew all around and turned it over and iron and sew the back side completing the French seam style.


 After sewing all the sides, Mae used a garter to create the neck ruffle.


Mae created her own bias that matches the bottom trim of the dress. Pin around the arm holes and sew making sure you are catching both sides of the bias.


Sew all the way through the end of the bias.


After finishing the dress, Mae did a simple back stitch around the initial.  The design looks polished with the black border around it.


How cute is this?!  

Monday, January 28, 2013

Valentine's Day Pin Cushion

Mason Jar Pin Cushion Portrait

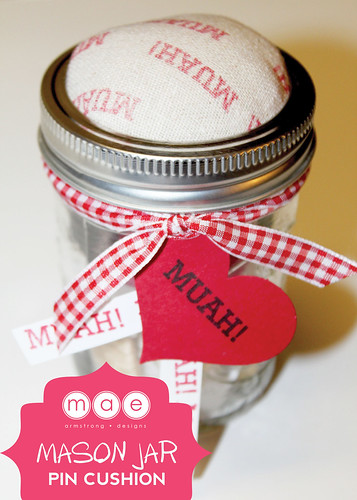
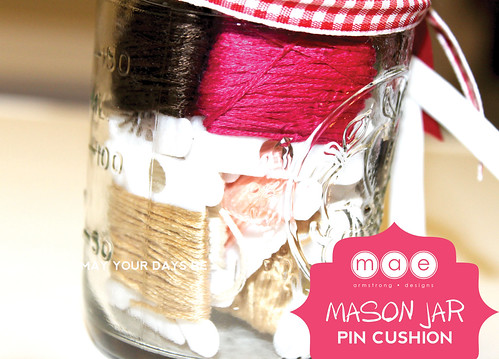
Our design team member Mae Armstrong was looking for a quick gift for Valentine's Day and came up with this super cute mason jar pin cushion.  I love the homemade gift, it's perfect for anyone you know that's crafty or likes to sew.

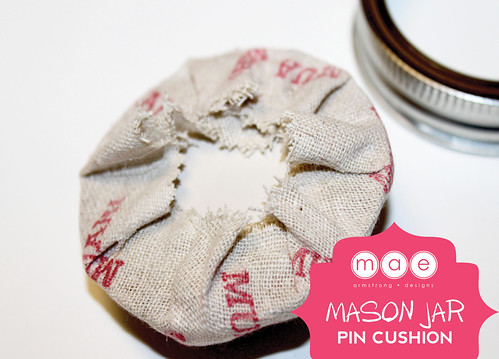
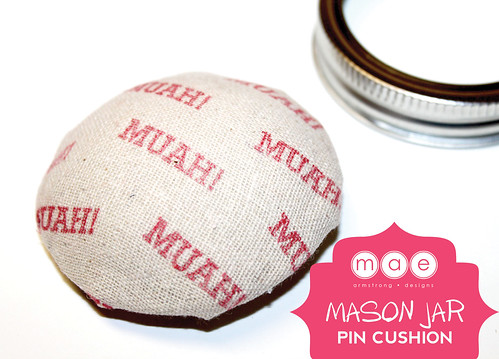
Mae started by cutting natural fabric around the lid of the mason jar. She used the "Muah!" stamp from PSA Essentials Smile Peel & Stick pack. She stamped the word all around the trimmed fabric in holiday red ink by PSA Essentials.  Then she glued the fabric to the cover of the lid.  She left a small opening to fill with fiber.  Once done, she glued the opening shut to secure.


Mason Jar Pin Cushion3

Then she inserted the prepared cushioned lid inside the ring.

Mason Jar Pin Cushion2

To make this a complete gift, she added a variety of embroidery floss, needles, buttons, beads and a small pair of scissors.

Mason Jar Pin Cushion

She secured the lid and wrap with a decorative ribbon. Then she added a simple gift tag (cut into the shape of a heart) with the matching sentiment.

 Mason Jar Pin Cushion Portrait

Super cute!

Tuesday, November 20, 2012

Thanksgiving Hand Towels

Sometimes though rarely, it's okay to have decorative pieces in your home that are not functional.  Take for example today's project by Taylor at Taylor Made.   These hand towels look smashing hanging from the stove in her kitchen, though I am not sure they make the best towel.  (I fear the ink would get wet and come off on clean plates, or clean hands....)   Still want to see?  Look how cute! 


Taylor is a master seamstress.  If you have any inkling of talent with a sewing machine, head on over to her blog to check out some of her sewing tutorials.  I love her recent post about burp cloths, the tutorial is simple and easy to follow.   She followed the same steps for these great cloths.  


Sometimes purely decorative pieces have a place in your house.  And I think this is one of them!

Wednesday, September 12, 2012

Painted and Stamped Pillow Case Dress

Mae Armstrong truly is one of the most talented people I know.  In the crafting world, I know a lot of people who are good at different things.  Some are talented bakers, chefs, or party planners.  Some are quilters or seamstresses.   Some are excellent card makers.  A few are good scrapbookers.   Mae just seems to be good at everything!  I love this pillow case dress that she made for her niece - it's perfect for the season, don't you think?   Today she shares a tutorial on how to make this dress.   Adapt and make it yours with different fabric patterns, colors and stamps! 


Start off by measuring the size for the pillow case dress.   Then prepare the freezer paper initial cutout using your Silhouette SD machine, or whatever you have!


Wrap the fabric on the board (it can be any type of board).  Mae did this process to prevent the fabric paint from sticking to my table.


 Wrap and secure with painter's tape.


Iron the freezer paper stencil and make sure all sides are secure.


Start filling in the center of the cutout.  Mae picked a Tulip soft fabric paint with glitters.  Don't girls love anything sparkly? 


Let the fabric paint dry for a few hours. Then start stamping your image on to the painted area.  Mae used PSA Essentials Skelanimals Chip & Friends Peel and Stick stamp set.


Mae used Yellow Owl Workshop stamp pad. Thought I would give it a whirl.


A side note about this ink.  Mae did a lot of research and says she thinks she found true love!  Since she works with fabric all the time, she thinks it's worth getting the ink pad just for that purpose.  


 Here's the stamped initial.


 After letting the painted and stamped initial dry. Start adding the elements to the pillow case dress.


Mae added a cute fabric trim and did a simple French seam.


 Pin all sides of the dress right side up in preparation for French seam.


 Sew all around and turned it over and iron and sew the back side completing the French seam style.


 After sewing all the sides, Mae used a garter to create the neck ruffle.


Mae created her own bias that matches the bottom trim of the dress. Pin around the arm holes and sew making sure you are catching both sides of the bias.


Sew all the way through the end of the bias.

After finishing the dress, Mae did a simple back stitch around the initial.  The design looks polished with the black border around it.


How cute is this?!  I bet her niece is going to love it.  Can't wait to see some pictures of her wearing it.