Monday, December 31, 2012

New Years Cards

Our New Years plans have shifted over the years.  Gone are the days of wild parties and late nights.  We used to attend a glitzy party which has a different theme each year: a black and white tie, a Vegas night, 1950's style, but since having Molly three years ago, I'm not sure I have seen the ball drop.  The night is like any other except sometimes we do a special dinner out, I spring for another glass of wine, and we maybe do an on demand movie.  I know -- it's so glam!  But the Johnson & Johnson tagline "having a baby changes everything" couldn't be more true.  And there's nothing I would rather do then spend a quiet night with my family.

To welcome the New Year, here are some beautifully designed cards by Jamie Cripps.  I love her layered approach to card making.   She uses a lot of die cuts, several patterns of paper, and tends to add a 3-D piece to her card.   It adds texture and visual interest.  In the first two cards, she's used the stamp from the new Multi-Holiday Peel & Stick pack.  


Here she's used stamps from Smirk Martini Mix.  This is a fun stamp set! 


I love the sentiment on this card - New Year, New Dreams.  She's stamped the characters from Smirk Kiss Me Now.


What are your dreams for the New Year? 


Friday, December 28, 2012

Monogrammed Memo Cards

The smallest things make me happy.  Clean sheets on my bed, all the papers on my desk at right angles in neat stacks, and the smell of fresh coffee are just a few.  These aren't big things.  Neither is today's project by Gina Luker at Shabby Creek Cottage but if you have the time to do it, it's a simple thing that can bring happiness to a chaotic day.  They're monogrammed memo cards.

Photobucket

Take a stack of scrap paper such as trimmings left over from your latest scrapbook layout or left overs from a school project, and cut them down to 3" x 3" or short memo size.  Load your PSA Stamper up with your Gigi Monogram choice and stamp the upper left or right, or lower right or left corners.  You can mix it up. 

Now when you have to write a quick memo to your husband, a teacher, a neighbor, it's a bit more personalized! And you didn't spend a lot of money creating them.  Easy! 

Thursday, December 27, 2012

Just a note card

I love letter writing.   A few years ago I got to see some correspondence between my grandmother and grandfather when he was stationed overseas.  Unlike an email that seems to vanish into cyberspace when deleted, a written letter can be kept forever as a keepsake.  It simply cannot be replaced.  I will encourage my children to write letters to grandparents, family and friends to keep the letter writing tradition alive.  It should be done not only for thank you notes, but also "just because."

This card by our design team member Regina Mangum is perfect when you want to send a note "just because."  It has our newest Peel & Stick stamp on it with the sentiment:  just a note.   Receiving a note amongst a stack of bills is a real bright spot.


I love the layered look of this card.  She's used newspaper, sheet music and patterned paper but kept the look unified with a black and white color palate.  This sophisticated card is perfect for any occasion, don't you think?


Tuesday, December 25, 2012

Merry Christmas!

Merry Christmas from PSA Essentials!  Did Santa make it to your home? We left the milk and cookies out and sure enough when we woke up, they were gone and there were presents under the tree!  That Santa is amazing.  I don't know how he does it.  All that wrapping and putting things together.  Too bad he doesn't also clean up the wreck afterwards! 

Today is a day about celebrating family.  I hope you get to do that today.   We are looking forward to spending time as an extended family, enjoying some good food and relaxing.  

Here are some cards for you by our talented design team.  Merry Christmas!

Whimsy Tree Peel & Stick Pack - Card by Kim Moreno 

North Pole Peel & Stick - Card by Kim Moreno 

Card by Kim Moreno 
By Regina Mangum 

By Regina Mangum

By Regina Mangum 


By Jennifer Holmes 

By Jennifer Holmes

By Jennifer Holmes
By Jennifer Holmes
By Jennifer Holmes
By Jennifer Holmes
By Jennifer Holmes
By Jennifer Holmes
By Jennifer Holmes

By Jennifer Holmes


Monday, December 24, 2012

Holiday Cards

It's Christmas Eve!  We hope that whether you celebrate the holiday or not, over the next two days you surrounded by your family and loved ones and are enjoying the season.   Here are some holiday cards by our design team members Jamie Green and Shelly Kurth that celebrate the holidays in style.  From everyone at PSA Essentials, we wish you happy holidays!

Uses Fancy Flakes & Tree-O Peel & Stick packs. Card by Jamie Green

Uses Chip & Friends Peel & Stick packs. Card by Jamie Green

Uses Peanuts Christmas Wishes.  Card by Jamie Green 

Uses New Multi-Holiday Peel & Stick pack & Tree-O.  Card by Shelly Kurth

Uses Tree-O and Vanilla Peel & Stick pack.  Card by Shelly Kurth

Uses Multi-Holiday Peel & Stick pack. Card by Jamie Green

Uses North Pole Peel & Stick pack.  Card by Shelly Kurth

Uses North Pole, Smirk Happy Holidays.  Card by Shelly Kurth

Uses Fancy Flakes, Archive Peel & Stick packs.  Card by Shelly Kurth

Uses Fancy Flakes & North Pole Peel & Stick pack.  Card by Shelly Kurth

Uses North Pole & Tree-O Peel & Stick pack.  Card by Shelly Kurth


Friday, December 21, 2012

More Gift Tags

Jessica Hill from Mad In Crafts adorned Martha Stewart's pre-made gift tags with our PSA Essentials stamps and I just had to share how they turned out.  They're adorable!  You can find these pre-made tags by Martha Stewart at Amazon.  They're perfect for gift wrap, as place card holders, or canning jars.

Jessica chose to stamp from PSA Essentials Whimsy Trees, UBU Peppermint Swing and Tree-O Peel & Stick packs onto white paper.  You could also stamp directly onto the tags, either way works fine!  She colored the trees up, the snowman up, and stamped "Joy, Peace, Love" in holiday red ink to give everything some life.   She embellished with some craft stickers and made these tags extra festive.

stamped tags


stamp tag embellishment

Simple and easy, these tags are perfect for the season!  Head on over to Mad In Crafts for a longer tutorial on how she created these gems - they're super easy!

Thursday, December 20, 2012

Table place cards

Ashley from Cherished Bliss shares how she is decorating the table and organizing her guests with these simple DIY place cards today.   Ashley is using some festive polka dotted paper from the craft store, a white tag, alphabet stamps, and her PSA Essentials Peel & Stick stamps to create this 2-minute solution to seating this holiday season. 

DIY Christmas Place Cards tutorial via Cherishedbliss.com #christmas
First Ashley stamped the Candy Cane stamp from PSA North Pole Peel & Stick stamps and cut it out using her X-ACTO knife.   Using alphabet stamps (or you could use PSA Vanilla Peel & Stick stamps here!) she stamped "Mommy."  Adapt for the guest you are seating when recreating this project. 
DIY Christmas Place Cards tutorial via Cherishedbliss.com #christmas
She glued everything together and voila!  A simple place card setting for your holiday table is born. 
DIY Christmas Place Cards tutorial via Cherishedbliss.com #christmas
I love the simplicity of this and it's sure to make an impact with your dinner guests.  Wow everyone with the little bit of effort it takes to make these this season! 

Wednesday, December 19, 2012

Kids Snowflake Ornament

Kids Simple Snowflake Ornament Craft from B-InspiredMama.com at Naptime Creations

Krissy always has great projects for her kids and today is no exception!  She was a guest designer and blogger for the popular blog, Naptime Creations last week.   She used her PSA Essentials Fancy Flakes Peel & Stick stamps, her PSA Stamper, and Royal Blue ink by PSA Essentials for the snowflakes in this project.   You can see how beautifully the snowflakes are stamped and really pop in this project!

Head on over to Naptime Creations to check out this tutorial.   Krissy of B-Inspired Mama gives step-by-step instructions and a supply list.  Oh, and the best part?  You'll have these ornaments done in no time.  They make great gifts for family members as well as keeping the kids entertained after preschool.

Kids Snowflake Ornament Craft from B-InspiredMama.com at Naptime Creations

Tuesday, December 18, 2012

Treat Canister

It's seems like there is an endless list of people to give gifts to this time of year -- the security officer in your community, your neighbor who picked up your packages while you were on vacation,  the teachers in school who cleaned your daughter up after a half-dozen accidents this fall, the list goes on....  Jessica Hill at Mad In Crafts has a fantastic idea.  It's a treat canister!  It's a simple gift that won't take you very long or cost too much money, allowing you to get to everyone on that long list.  

neighbor treat container


To make Neighbor Treat Canisters, you will need:
  1. treat canister (from Target)
  2. craft paper
  3. PSA stamps and inks
  4. address stamp
  5. scrapbook paper (like Martha Stewart’s Paper Pad)
  6. circle cutter
  7. glue dots
  8. gold pen (like EK Success Metallic Dual Writer Pen)
  9. Christmas cookies (like my Chocolate Hazelnut Shortbread Cookies)


stamped cookie carrier

Jessica found the cute paint can-like canisters in the dollar section at Target.  Check The Dollar Store or Michael's, too because they're everywhere!   They have a little handle and come in Christmas red and green.  To make the canister  look even more festive, Jessica stamped craft paper and wrapped up cookies.    Jessica used her hunter & red ink and the Tree-o and new Mixed Holiday stamp packs from PSA Essentials.

neighbor treat containers

Jessica used her personalized Wallace-style address stamp to add their name and address to the top of the canister to identify where it came from.  She cut some circles out of scrapbook paper and then added some flourishes with a gold pen.  

I love how simple this idea is and how it had such a personal touch!  And because it doesn't cost very much, you can really stretch your dollar here.   

Monday, December 17, 2012

Stamped Clay Tags


It's about time to get wrapping if you haven't already.  Do you make your gifts look extra special?  Sometimes going that extra mile really elevates the gift, especially if you aren't giving a lot of presents.  Here's a beautiful DIY gift tag tutorial by Jessica Hill at Mad in Crafts.   How pretty is this present? 

stamped clay gift tags


Jessica Hills says that these elegant sparkly clay tags are astonishingly easy to make!  And, as an added bonus, you can make them with supplies you might already have in your baking cabinet.  All you need to add is a little glitter and some rubber stamps.  

You will need: 
  1. a batch of Glittery Clay
  2. PSA gift tag stamps
  3. cookie cutters
  4. oven


dust with cornstarch

To begin, you will need to make a batch of Glittery Clay. You can find the recipe and instructions for cooking up the dough in this guest post she created for Dollar Store Crafts. Make the dough, let it cool, and then roll it out.

press the stamp into the dough

Our PSA Essentials gift tag stamps are perfect for this project.  You can use any clear stamp you have on hand, but the PSA stamps have the TO and FROM sections built right in! 

Jessica left the PSA gift tag stamps on the plastic packaging and firmly pressed the stamp into the dough.  Then carefully peeled the stamp off.  She cut around the stamped area with a cookie cutter and then baked the tags the same way she baked the ornaments.  One batch of dough will make 1-2 dozen clay tags.

clay tag

After the tags have cooled, all there is left to do is to attach the tag to your gifts and add the correct names!

clay snowman tag

See how crisp the PSA stamps come out!  So beautiful.  These are such special keepsakes to beautify your presents and they can double as an ornament to be used year after year.   And with the cost being so low, you can make them for everyone on your gift-giving list. 

Head on over to Jessica Hill at Mad In Crafts for more great ideas in money saving crafts! 

Friday, December 14, 2012

Kids Cookie Decorating Party

I always have these grandiose ideas for children's parties, be it an Easter Egg Hunt, a birthday party or something for the season - I really dream big and wish I had an unlimited budget and time to do the things I really want to do!  This Christmas I thought it would be fun to do a kids cookie decorating party.  It certainly was!  We invited 28 kids (and ended up with 20) to come decorate 15 dozen sugar cookies at the Port Royal Beach House on Hilton Head.   We asked all the kids to bring a toy for The Deep Well Project, a local organization that helps families in need.   We hired the most fantastic Santa of all time, who read the children "The Night Before Christmas."   We also had a card making station where the children made holiday cards using PSA Essentials Peel & Stick stamps!

I must say that this party could not have been done with out my parents help.  My parents not only baked the cookies (all of them!) but helped take care of the kids while I set up.  They helped fund the event and do a lot of the grunt work (like clean up...)  It was as much hosted by The Evaniskos as it was The O'Regans!

The party was from 2-4 pm on Sunday, December 9th, and because of the mid-afternoon time frame we only had a bit of food.  My mom made her famous Hambuns, we had a pizza roll tray and veggie tray from Publix, and some chocolate cupcakes made by Ronnie's Bakery.    I set up a food table with some Christmas tree decorations and created a stocking banner to make things look extra festive.


 This banner was super easy since I purchased the pre-made stockings.  I spray painted clothes pins red, and I stamped the white stockings with 4 different stamps from U.B.U. Peppermint Swing and U.B.U. Mrs. Claus.    I chose a stamp to represent each of the 4 members of our family.


Molly and I made this reindeer decoration.  I purchased the die cut reindeer, we painted them red and green, and then added googly eyes and pom-poms for noses. 


Here she was painting them!


I marked all the food on the buffet table with little signs. I stamped from U.B.U. Mrs. Claus to dress them up and used my hunter green ink in my PSA Stamper.  I wrote in red marker to be festive!


I made easy cupcake toppers with my 1.5" inch and 2"inch round punches. I stamped all 18 stamps from U.B.U. Mrs. Claus and U.B.U. Peppermint Swing using hunter and red ink in my stamper.  I just switched out the middle and kept the candy cane outer border.


The cookie decorating stations were set up on three long tables (we had 20 kids, afterall!)  I had signs that said "please take 8 cookies each" so everyone knew how many to decorate.


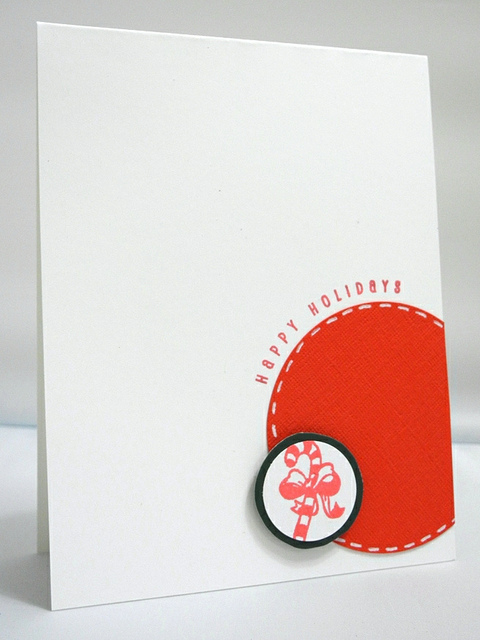
I loaded a bunch of Stampers up with different inks (holiday red, hunter green, hunter and red, espresso, royal blue) and different holiday stamps from PSA Original holiday ones (Tree-O, North Pole, Whimsy Trees) and put out a bunch of crafting supplies for the kids to make cards.


Cookie decorating was a lot of fun - Molly, my daughter just loved it!


Of course many of the kids also ate the cookies they were decorating...


Santa arrived around 3 pm.  There was some mixed excitement with the kids - some very enthusiastic, others didn't care, a few were scared of him!


Connor woke up just in time to meet Santa, too!  (And he was a little red nosed from his nap!)


It was a great afternoon and a fun party!