Tuesday, December 23, 2014

Merry Christmas!

Can you believe Christmas is almost here? I'm busy with last minute shopping and wrapping.  I make every effort to make the packages just as special as the gift inside.  It's always so much fun to receive a beautifully wrapped present! PSA Essentials gift tag stamps make it cute and easy to make your own gift tags and add an extra special touch to your gift giving. See what our design team has come up with using the Gift Tag Stamps


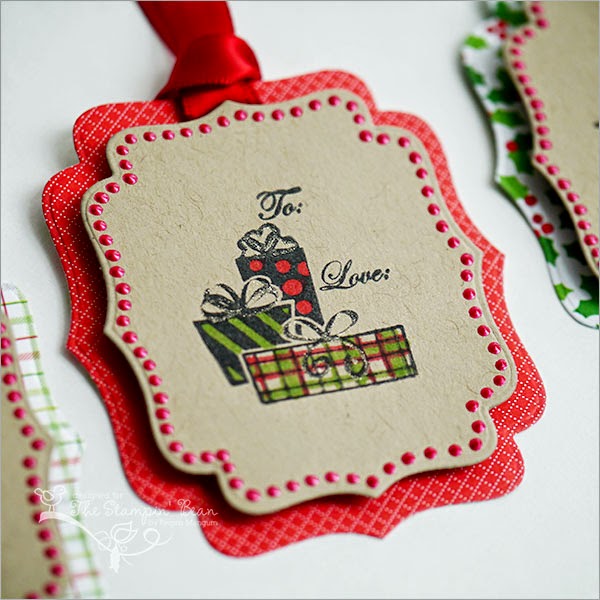
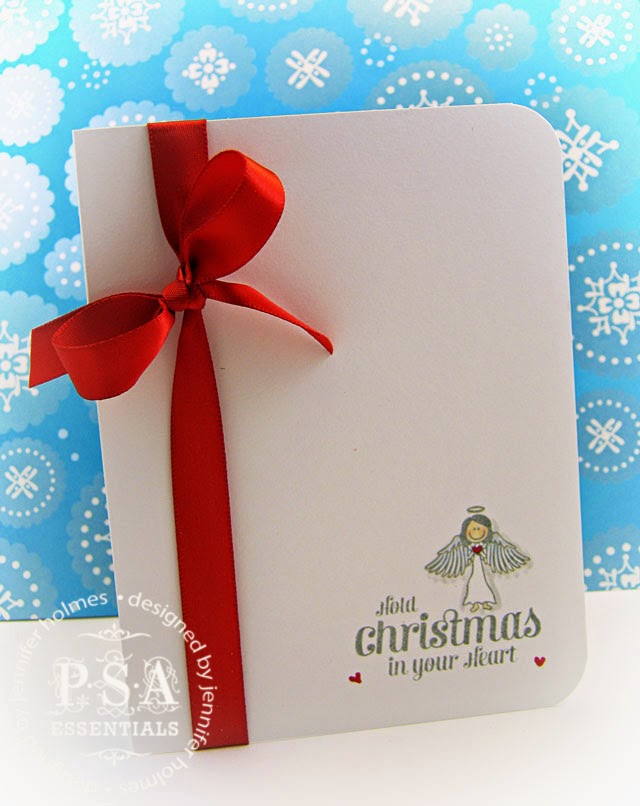
Make sure to color the stamps up to bring them to life! Head on over to Cyber Savvy Shop to check out all of our gift tag stamps. Merry Christmas from everyone at PSA Essentials! 

Tuesday, December 9, 2014

New Years Eve Party Ideas

November came and went now I can hardly believe that we are into double digits in December. I had lofty aspirations of getting my act together and hosting a cookie decorating party for my kids but it's time to face that idea is just not going to happen. So I am moving on to planning a New Years Eve celebration!

A few years ago, my clever husband came up with the idea to watch the ball drop on YouTube from the previous year. This way you can see the ball drop at any time that's convenient for you, and you don't have to stay up until midnight.  Does it matter if it says 2014 or 2015? That all confuses me anyway.  When decorating and crafting, which number do I use?  Saying farewell to 2014 or ringing in 2015?

This year we are having our friends The Bradfords over (like most holidays!) and I've rounded up some cute decor on Pinterest to try.  Here's what I am inspired by!

A bubbly bar makes your new years party extra special

wat heb je nodig: champagne, ultrafijne glitters (goud, zilver, ...), kranten. 1. leg wat kranten neer op tafel 2. druk een krant door de top van de champagne tot waar je het liefst de glitters wilt (zie tekening) 3. besmeur de champagne fles met lijm, haal er eerst het etket af. 4. doe dit aub buiten! nu strooi je overal glitter! laat het stevig drogen en klaar!

Absolutely getting these for our party!! New Years Eve Photobooth Props 2014 glitter by PhotoPropAttic, $15.00

Glitter "Pop Fizz Clink" New Year's Eve Photo Booth Prop Decor Party or Weddings New Years Etc Wooden Words Cutout Prop (Item - PFC100)

Gold dipped balloons--a #NYE party must-have.   Click to find out how to create and other glittery ideas for hosting the Ultimate DIY New Year's Eve Party!

LOVE these Confetti Wands by Anthropologie! Would work great for a glittery birthday celebration!
Confetti. There must be confetti!  That's what vacuums are for. 


Pink Champagne Holiday Party Invitations
Invitations by Minted (Envelope liner a must!) 

Of course, my invitation and envelope will also have my PSA Essentials personalized address stamp for easy return addressing and I am sure to find a way to use my Peel & Stick stamps in my decor....What do you do for New Years Eve? Share your New Years Eve decorating ideas with us here or on our Facebook page. 

Tuesday, December 2, 2014

DIY Monogram Door Wreath

If you loved Mae Armstrong's DIY fabric pinwheel ornaments last week, you will love this variation on the project. Need a festive, personal front door wreath for the season? Try this one by Mae! It involves quite a bit of work (fair warning) but the result is fabulous and the tutorial is really detailed so you will get a great finished product. Best of all, you can reuse this each season.

For this project, Mae used her PSA Essentials Treeo Peel & Stick stamps. This is really a versatile stamp set!

Mae started by using the biggest embroidery hoop she could find at Michael's.  (Don't forget your Michael's coupon!) 


 Trim the size of the base fabric. For this wreath Mae selected natural burlap as her main canvas.  


Insert the burlap and attach the outer hoop. Tighten the screw and secure. Gently stretch the burlap making sure it's nice and flat. Set aside.


Mae also wanted a black initial and she found that felt was the best option. Using her Silhouette SD, she selected a decorative font and trimmed the letter. She used freezer paper and ironed it using a low setting onto the felt to serve as her pattern.  She then cut the felt and glue the letter onto the center of the stretched burlap.


Mae chose to decorate her wreath with stamped wooden discs mounted on a fabric pinwheel. She used the PSA Essentials peel and stick TreeO stamp set.


Using her Big Shot, Mae selected a circle die to help her with her fabric pinwheel production. It was a truly a great way of cutting all the fabrics she needed.  You'll need five circles to complete one pinwheel.  (And she made a lot of pinwheels!) 


To assemble the pinwheel start by folding the circle in half.


Then fold into a cone shape making sure the edges meet. Secure with glue and begin with the rest of the of the remaining pre-cut fabric.


Mae made a whopping 14 pinwheels for this wreath as she wanted cover the entire hoop. That means this project required 70 circles to complete the wreath.  Since she knew she was going to re-use it again she didn't mind the time of putting it together.  (This woman is amazing!)


Arrange the folded pieces to make a circle. Glue the stamped wooden disc.


Line the edge of the hoop with the fabric pinwheels and spread them out. Secure each pinwheel with glue.


And voila!  Didn't it turn out beautifully!?

Friday, November 28, 2014

Fabric Pinwheel Ornament

An cue the holiday projects! I'm bringing readers dozens of seasonal, DIY, crafty goodness over the next couple weeks.  This idea comes to us from our design team member, Mae Armstrong.  Mae used her Gigi Monogram Peel & Stick stamps by PSA Essentials and holiday fabric to create beautiful monogram ornaments.  These make great gifts for teachers, neighbors, Secret Santa gifts or are just fun, DIY additions to your own tree. 


Want to learn how she did it? It's fairly simple. First she stamped the "A" onto wooden discs to be the center of the ornaments using her PSA Stamper & Gigi Monograms.

Using her Big Shot machine, Mae selected a circle die to help her with the fabric pinwheel production. It was a truly a great way of cutting all the fabrics she needed.  You'll need five circles to complete one pinwheel.


To assemble the pinwheel start by folding the circle in half.  


Then fold into a cone shape making sure the edges meet. Secure with glue and begin with the rest of the of the remaining pre-cut fabric. Mae suggests cutting all the circles in one batch and the rest of the process gets really easy.

Arrange the folded pieces to make a circle. Glue the stamped wooden disc.


 Attach a stretchy gold string and that's it! 

Try making different sets for friends, family, teacher gifts or a fun gift tag for the Christmas! 

Thursday, November 27, 2014

Thankful

Thanksgiving is truly my favorite holiday. As I have said before, it's the only holiday that I feel isn't focused on candy and presents, but truly being thankful for all that we have. And in my family, I feel so incredibly lucky and so incredibly thankful. My favorite tradition on Thanksgiving is when each person goes around the dinner table and says what they are thankful for. The responses are always surprising and interesting. What are your Thanksgiving traditions? What are you thankful for?

I am always a sucker for a good quote and a free printable. Today I am celebrating Thanksgiving with great verses, quotes and more about being thankful.  Happy Thanksgiving!


Available on Etsy 

Happy Thanksgiving! 

Tuesday, November 25, 2014

DIY Christmas Tree Garland

How do you decorate your Christmas tree? Heidi at Honeybear Lane created this really cute stamped garland using PSA Essentials Peel & Stick stamps. 


Creating this garland is easy. Heidi choose Whimsy Tree Peel & Stick stamps and stamped using her PSA Essentials stamper loaded with hunter green ink onto white cardstock. She used her 1.5" circle punch to cut out and adhered to red and green cardstock punched with a 2" tool.  Then she sewed them together. 


I love how it turned out! She sewed right through the middle, too... 


She also created this "NOEL" sign to decorate her mantel. This one uses Archive Peel & Stick stamps by PSA Essentials


How are you adding a festive touch to your holiday decor this season? I love these ladies that are doing it themselves. Share your projects with us on our Facebook page

Friday, November 21, 2014

DIY Stamped Gift Card Holder

Do you give a lot of gift cards over the holidays? Consider elevating your gift card gift with a special envelope or holder like Jennifer Holmes did.  She created a gift card holder that makes that gift card extra special! She used UBU Peppermint Swing Peel & Stick stamps by PSA Essentials to create this project. Check it out!


I love how she colored the stamp up and really brought it to life! 


This stamp set is really adorable, one of my favorites for the holidays! 

Ubu Peppermint Swing

Wednesday, November 19, 2014

Holiday Cards

It seems that people everywhere are skipping over Thanksgiving completely and headed straight into Christmas. Target is fully decorated, our neighborhood has Christmas decorations out and I know of dozens of people who have already started shopping for this holiday. Which camp are you in?

If you happen to be one of those fans of 2 months of Christmas (check out the hashtag #twomonthsofchristmas, apparently there are a lot of people who are fans!) then this post is for you. Today I am sharing some of our favorite Christmas cards made by our PSA Essentials design team. I guess if you are going to hand-make your Christmas cards, you really do have to be prepared!

Here are three of my favorites from Jennifer Holmes. Some great inspiration here, especially when it comes to choosing your color combos. Not everything has to be red and green!


Here are a few of my favorites from Carly Robertson. The "holiday letter" stamp is one of our most popular stamps sold in our Treeo Peel & Stick stamp sets


Regina Magnum made some really cute ones for us, too! 


Which one is your favorite? Plenty more card and holiday card inspiration to come here on the blog! 


Sunday, November 16, 2014

Thankful Tree

Last year I saw lots of my crafty, blogger friends doing cool advent calendars for Thanksgiving. Rather than getting something each day before Thanksgiving, you have to give something or do something nice each day before Thanksgiving. Love it! Thanksgiving is one of the few holidays that isn't about candy and presents -- so I think it's a real opportunity to teach something great to your children. For the second year in a row, our family is doing a "thankful tree." Every night at dinner, we write down something we are thankful for and add it to our tree.  Molly is beginning to understand the concept of "being thankful" and it's just funny to hear Connor's responses. It's a great exercise for adults, too! Responses range from serious to silly and both are okay with me. 

We also made the creation of the tree an event.  You can can create your thankful tree with your kids easily. All you need is: 
  1. Cardstock or construction paper in fall colors 
  2. Scalloped edge scissors 
  3. Window marker (for free) 
  4. PSA Essentials Topiary Peel & Stick stamps & PSA Stamper 

Start out by quickly outlining some oval shapes, somewhat resembling leaves. (Not an exact science!) 


When the leaves are cut out, stamp using your PSA Essentials stamp loaded with the flower basket from Topiary (or your choice!) 


Using your window markers, draw a tree on the window.  Using tape, stick your leaves on the window! (Please ignore my dirty window.) 


I chose to write a quote on the window above the tree: "A Thankful Heart is the Greatest Virtue." I spotted this last year on vacation and really love it! 


Here's how our tree turned out! Each day we add more and more leaves. I save the leaves and really enjoyed looking back on what everyone was thankful for last year. A fun family tradition! 


Happy Almost Thanksgiving! 

Friday, November 7, 2014

Emily McCarthy Holiday Trunk Show Event

Last night Lesley and I headed to Savannah for The Emily McCarthy Holiday Trunk Show Event at her studio space in Cohen's Retreat. Emily designed a line of personalized stamps and embossers for PSA Essentials months ago and we just love her coastal chic, upscale style.  A paper stylist turned lifestyle designer, Emily embodies her love of monogramming and personalizing, her family, and entertaining in just about everything she does. Emily debuted her Prosecco Candle (which Lesley and I both had to buy!) and showed off her extensive line of acrylic serving trays, glassware, cutting boards, gift tags, cocktail napkins, and of course, stationery (which I also ordered).  A huge congrats to Emily for a successful event and a very successful brand!

I only had time to take pictures when it was slow -- she had a huge turn out! Here's a look at some of the fun and her products.


A big congrats to Emily once again!  Shop all PSA Essentials stamps and embossers by Emily McCarthy by visiting her website and learn more about this designer here

Wednesday, November 5, 2014

Halloween Dinner Party

We spend every Halloween with our good friends, The Bradfords, having a dinner party and then heading out in our neighborhood to trick-or-treat. The Dads seem to get into the costumes just as much as the kids! I am a sucker for Halloween decorations and packaging, right down to the wine, soda and tablecloth.... This year, I used my PSA Essentials Peel & Stick stamps to create place card settings which also doubled as little favor bags. I also used my PSA Essentials stamps to create cupcake toppers and appetizer "flags" to make things even more festive. Here's a quick look how to create the favor/place card bags and some cute Halloween photos!

Favor/Place Card Bags Supplies Needed:
  • PSA Essentials stamper 
  • PSA Essentials Peel & Stick stamps; I used PSA Haunted Shack 
  • Treat bags, I love Recollections 
  • 2" circle punch 
  • 1" circle punch 
  • Halloween cardstock 
  • Marker, I like Faber Castle 
  • Black and white twine from The Twinery 
Instructions:

1) Start by stamping using your favorite stamp from PSA Haunted Shack onto white cardstock. Then punch out using your 1" circle punch.


2) Using your 2" circle punch, punch out some festive paper.


3) Have your little helper glue the white stamped cardstock onto the pattern paper. 


4) Now create the tags. Stamp onto tags found at Michael's. Write the names of your dinner party guests. Thread with twine from The Twinery and into holes that you punch out in the bags.


5) As the last step, put the stamped circles onto the front of the bag. 


Halloween Fun! See what I mean, I am a sucker for packaging! "Disco Dad" and the Cave Man were really enjoying themselves. Of course, so were my children, Elsa and Fire Chief Connor.


Onto Thanksgiving crafts and fun! Cannot wait.